Hey gang!
Can we just say that we ♥ multiples? Especially twin girls AND especially one's that are as cute as Stephanie @ The Silly Pearl's are! Darling! Their creative momma is pretty darn cute, too... take a peek at her cool project below to see what we mean- we are loving the creamy yellow & blue together :) Thanks for being here, Steph!
xo
__________________________I was so excited when the lovely Lolly Jane ladies asked me to guest post on their blog! I’m sure that like all of you, I am amazed by their creativity as well as their friendliness and supportive nature towards other craft bloggers. It is such an honor to be here! Thank you Kelli and Kristi!My name is Steph and I blog over at The Silly Pearl, about the crafts I make in between spending time with my husband and 4-year old twin girls. My mom taught me how to sew and craft when I was in elementary school, and I’ve just always had the need to create since then. She’s still my crafty partner-in-crime!A year ago, I left a 12-year career as a Healthcare Data Consultant to become a stay-at-home mama. And now that my girls are at preschool a few days a week, I’m excited to be crafting again! Plus I’m even more excited that I just hit 300 followers on The Silly Pearl which I started in February 2011. Look for a giveaway coming soon to celebrate! Woohoo!AI love to make things for my girls that are fun and educational, like this clock pillow:I love cooking with my girls too...each month I contribute a kid-friendly recipe to the Multiples in the Kitchen series on the Multiples and More Blog Network:I love wreaths for the front door to celebrate the seasons and special days:Summer’s already half over and I still have my Spring Wreath on my front door! I’m long overdue for a summer wreath. I wanted something cheerful with pretty colors. And something about stringing wooden beads together makes me think of summer as well.So here’s how I made my Wooden Bead Summer Wreath!Materials:
- Wood beads with fairly large holes. These came in packs of 30, and I used 5-6 packs.
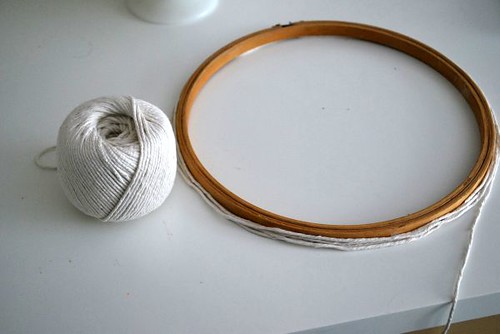
- Kitchen twine
- Tapestry needle
- Scissors
- Spray paint
- Newspaper (not shown)
- Masking tape or painters tape
- Cardboard
- Round template about the size you want for the wreath, like an embroidery hoop
- Glue gun
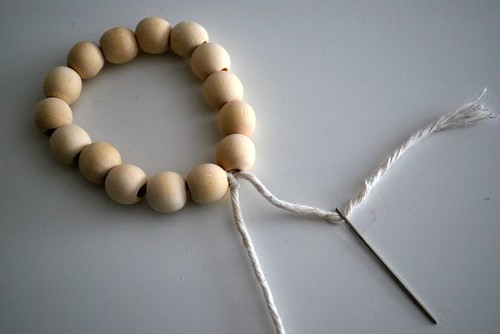
 Thread one end of the twine through the tapestry needle and string some beads. Form a loop as you go and determine if that's the size you want. Here, I decided 15 was good. Tie a knot to secure. Remove the needle.
 If you look at the finished picture, you'll see that there are 7 beads in each blue section and 8 beads in each yellow section (so 15 per loop). So first, string a bunch of beads on the other end of the string. It will be a multiple of 8. As you string, lay it out in a weave pattern to determine when to stop stringing. Each weave has 8 beads. When you've met the other side, stop stringing. For me, I made 11 weaves, or used 88 beads. I know that sounds like a lot!
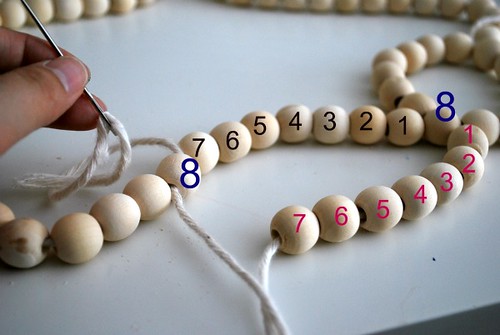
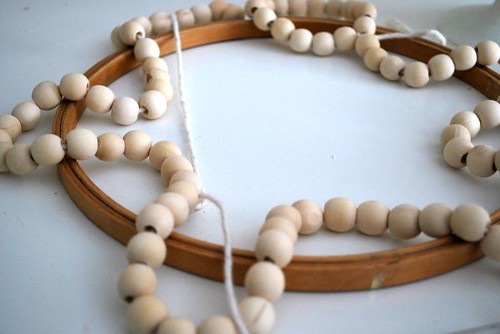 Now we'll join the two ends i.e. the end of your long strand of beads to the original loop you made. Thread the long strand through the 8th bead in the original loop and pull until the beads meet.
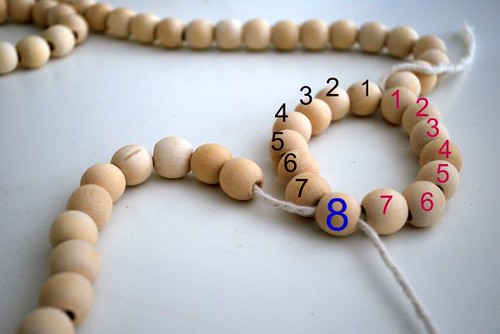 Now we’ll start the weaving pattern. String on 7 beads (the pink numbered beads in the pic below) and then count 8 beads on the other strand (the black numbered beads). You’ll thread the string through the 8th bead. Repeat the serpentine pattern til you get to the end.
  To finish, thread your needle through the 8th bead of the original loop, and then tie a knot. For me, the final knot was in the same spot as the very first knot I tied to make the original loop. You can add a dab of glue to all the knots for extra security but it should be ok.
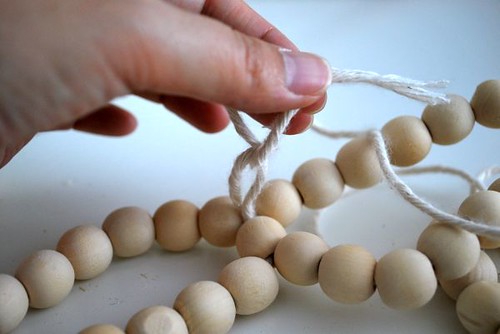 Note: Be sure to pull the string taught but not so much that the loops look warped. And try to pull them all equally taught or some might be bigger or floppier than others.
Before painting the beads, start creating the wreath form. You can always purchase a wreath form and base the size of the wreath on that, but cardboard is perfectly adequate. I took the 9-inch embroidery hoop and laid that on top of the beads. Then I took a bigger hoop and laid that on top as well. As long as the beads overlap the hoops it should be fine.
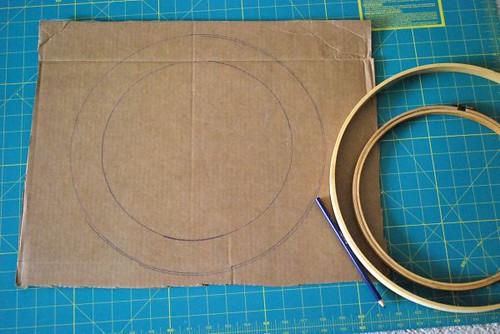
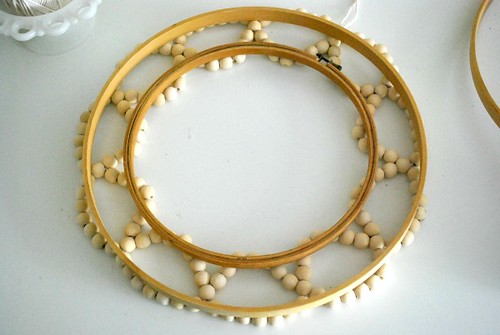 Then lay the two hoops onto the cardboard and trace around. Set aside for now…you can finish this part while the paint is drying.
 Ok, time to paint! First I painted the blue section, so I took strips of newspaper and wrapped the other beads (that I would later paint yellow) and taped them down. The 8th bead through which you weaved the twine to make the pattern will be yellow, to be the “point” of the sun rays. So make sure you cover that one well to avoid color overlap.
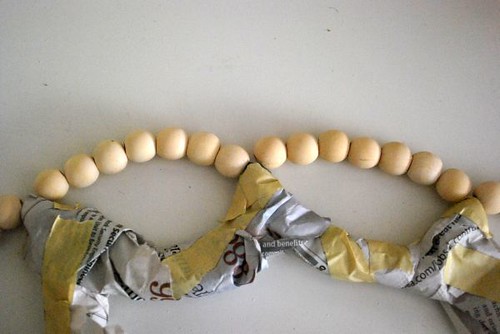 Note: you can always paint the beads first. Since this was my first time making this wreath, I didn’t know how many beads I wanted to use, or how many would be yellow or blue. But if you follow this tutorial exactly, or if you want to make it all one color, random colors, etc, you can definitely paint the beads ahead of time and you won’t have to worry about covering sections and overlapping paint.
I sprayed 2-3 coats on one side. This particular paint dries in 10 minutes so I waited that long in between coats.
After the last coat, I waited about an hour and turned it over to paint the other side.
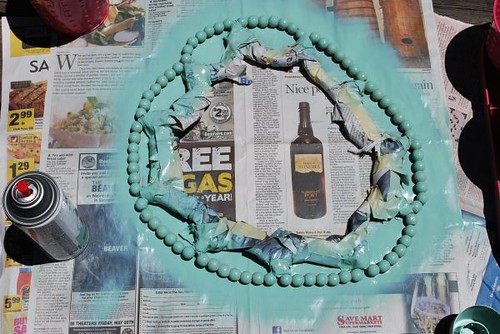 After a few hours to make sure it was completely dry, I repeated the process with the yellow paint. Cover up the blue sections and apply 2-3 coats, then flip over and paint the other side.
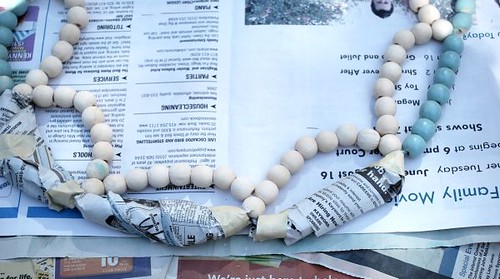 I noticed when everything was dry that I missed a lot of spots, and some of the yellow did overlap on the neighboring blue beads. So I went outside and sprayed some paint into a bowl and used a paintbrush to do some touching up. Just a thin coat should be fine. Allow to dry for an hour or so.
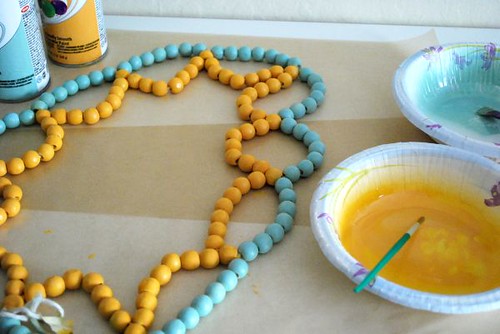 So during all that paint drying time, you can work on the wreath form that you traced out. Use scissors or an X-acto knife to cut out the cardboard form. Then start covering it up. You can use yarn, ribbon, strips of fabric, or paper. Since my front door is white and I wanted a neutral and clean background, I chose the same white twine. So tie a knot and leave a little tail. Wrap wrap wrap and wrap some more, then tie a knot to the tail you left.
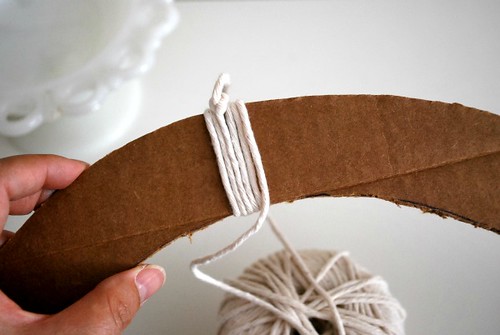 When you're done wrapping, Tie another length of twine at the top. This will be for hanging the wreath.
 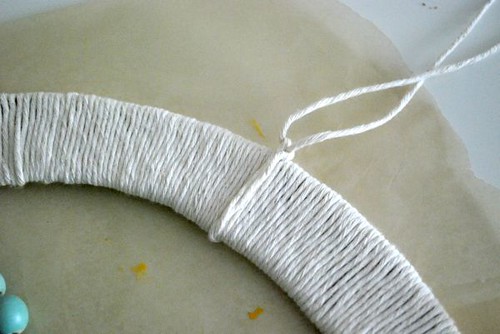 We’re almost there! Lay the beads on top of the wreath form. The blue beads just barely drape over the outside edge of the wreath form, and the yellow beads will stick out towards the inside edge.
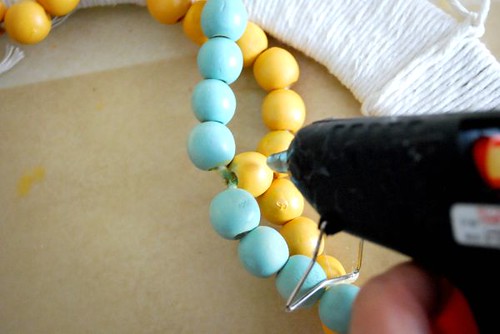
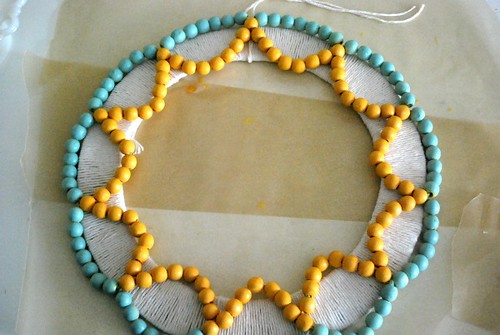 Take one of the 8th beads and center it on the twine you just tied to make the wreath hanger. Apply hot glue on that bead and press down. Making sure the beads are evenly spread out and positioned well, glue the 8th beads towards the bottom, then on the sides, until all the 8th beads are glued down. Then glue down the blue beads to the side edge of the wreath form (just the 2-3 middle beads should be fine). If any of the loops sag, or if you notice beads that still didn’t get quite covered up with paint (argh!) you can glue those down too.
 Hang it up, and you’re done!
 Yay for Summer!
Hope you’ll stop by The Silly Pearl to say hi and check out my other tutorials! Thanks a million to Kelli and Kristi for having me here today!


Great post! Thanks for being our guest, Steph :) xo
ReplyDeletesuper cute wreath- what a cool way to use beads!
ReplyDeleteoooh I love steph's site! so cute-love that wreath!!!
ReplyDeleteThat's a fun idear!
ReplyDeleteSo fun!
ReplyDelete