Have you seen the newest trend in displaying pics?
No? Hmmm, well did you notice this cute pic of Kelli & co.?
Oh wait, here it is!

The talented Michelle Herrick {see her site & blog} is showing us how to create a storyboard today. Be sure to check out her holiday photo mini-sessions soon as spaces are limited.
Thanks for hosting today's post Michelle :)
. . . . . . . . . . . . . . . . . . . . . . . .
Before creating your photo storyboard you must first decided on the size. If this is just for web and blog only then the size really does not matter, however if your purpose is to have this printed then you will need to take into considerations what printing sizes are available to you through you local photo print lab.
For the sake of this tutorial we are going to create a 14x11 storyboard for the purpose of printing (not for the web).
Things needed:
Photoshop (elements or any of the CS series)
Hi-resolution photos (any quantity, but photos should be around 300dpi)
When collecting photos to use in a storyboard you want to be sure that they all relate to each other, or there is a common theme in which you can connect each one together (i.e. birthday, bath time, Easter, summer vacation, etc.) Here are the photos I want to use for my storyboard - photos from our California vacation this past summer:

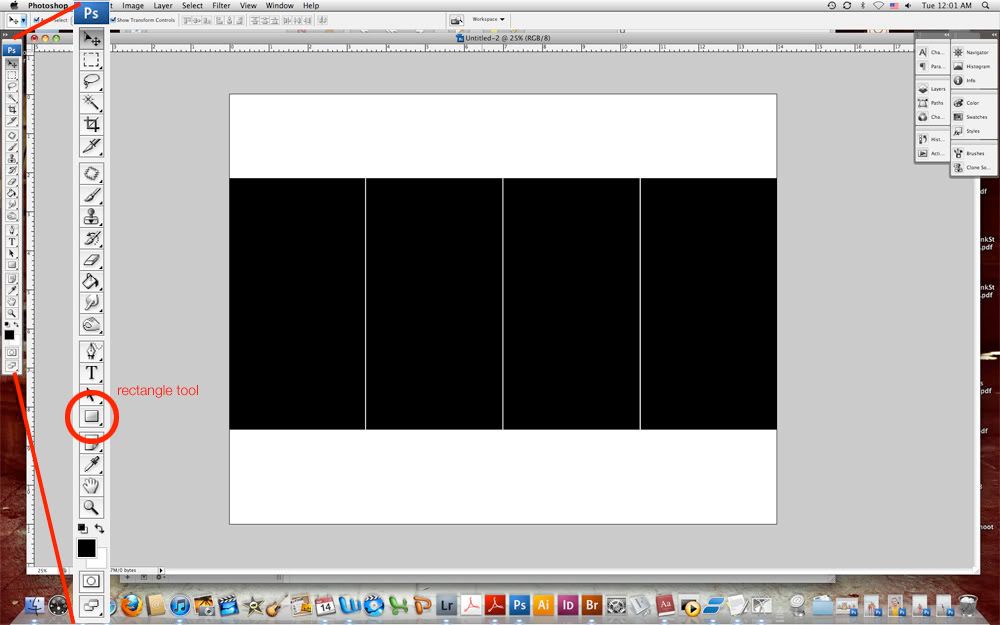
First I will need to create my storyboard document in Photoshop (I am using CS3, however this should be possible in any version of Photoshop). The sizing will be 14" wide by 11" tall at 300dpi.

To me, the key in creating your storyboard is to play around with the configuration and layout using the rectangle shape tool rather than bringing your photos in and sizing and resizing them to try and make them fit. I am going to create 4 identically sized shapes to represent my photos and will move those around to come up with a layout and design first. The shape you choose to use does not need to be a rectangle or have to be the exact shape of the photos. You could use circles or squares to represent your photos, however whatever shape and size you end up using is what the final shape and size of the photo will be... and I'll show you why... (*Trick... to duplicate an exact match of an object or shape hold down the option key as you click and drag the shape.)
Now the reason for these shapes is because they are going to be clipping masks for the photos. That means when we bring the photos into the storyboard area we are going to clip or attach them to each one of these shapes - therefore the photos are going to take on the size and shape and proportion of each one of the 4 shapes shown.
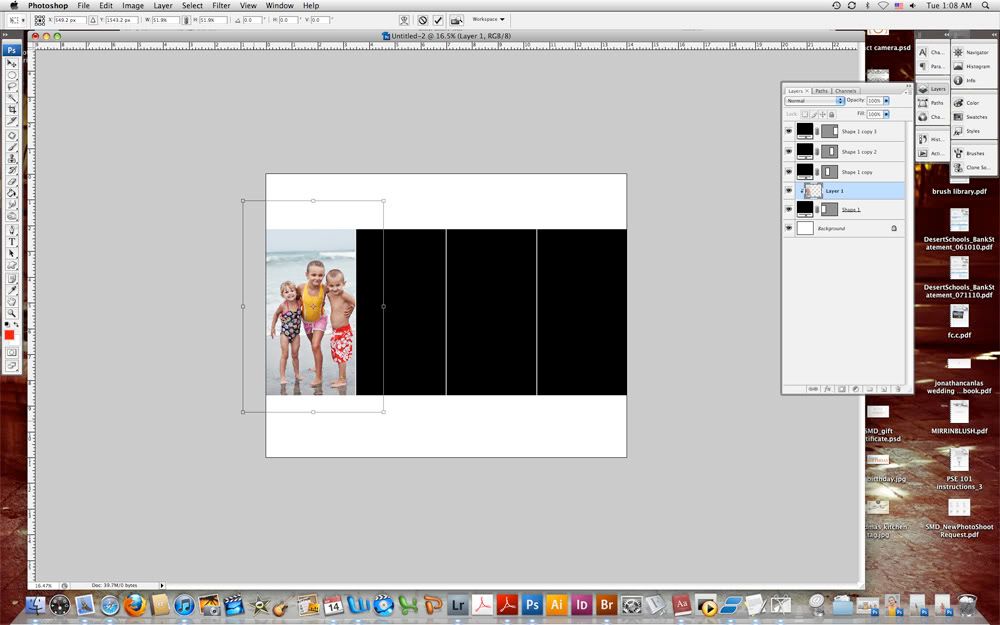
First start off by clicking or selecting the shape where your first photo is going to go. For this example I am starting with the rectangle on the farthest left side.

Then open your photo and either click, drag and drop it onto your storyboard or copy/paste it in - whatever method you are used to using. Here is the photo I want to start with at the beginning of my storyboard before I dragged and dropped it in...
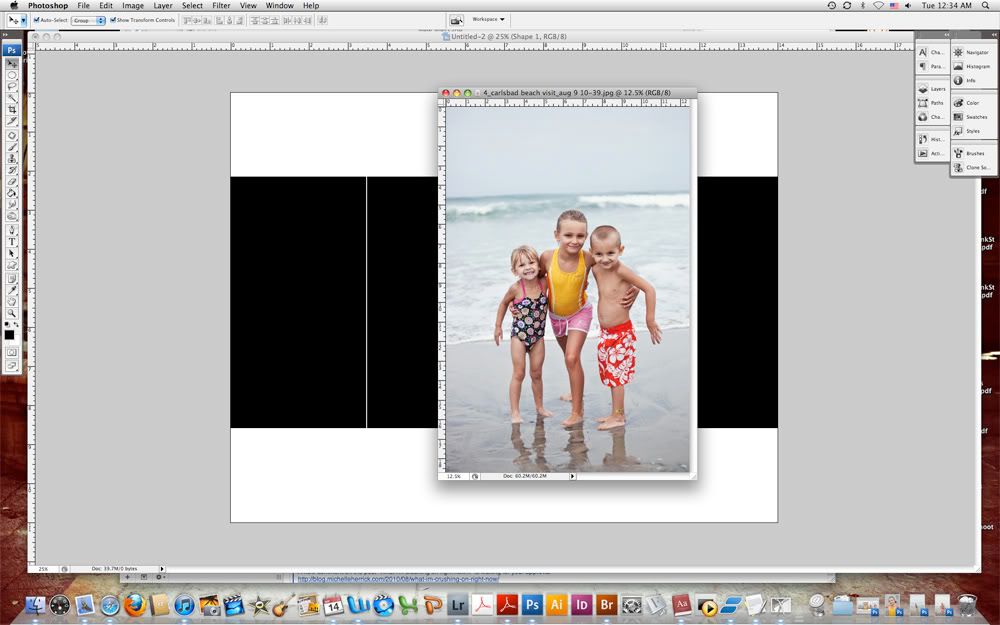
Now here is my storyboard with the photo added to it.
You can see that the image is on top of the first rectangle but underneath the other 3... that's what you want... that is why we selected the rectangle we wanted to start with first before importing the photo into the storyboard. Otherwise when the photo was added to the storyboard it would have ended up on the very top and you would have had to drag it down 3 layers in the layer palette to place it above the shape you wanted to start with. Not really a big deal, but it just adds an extra step or two.
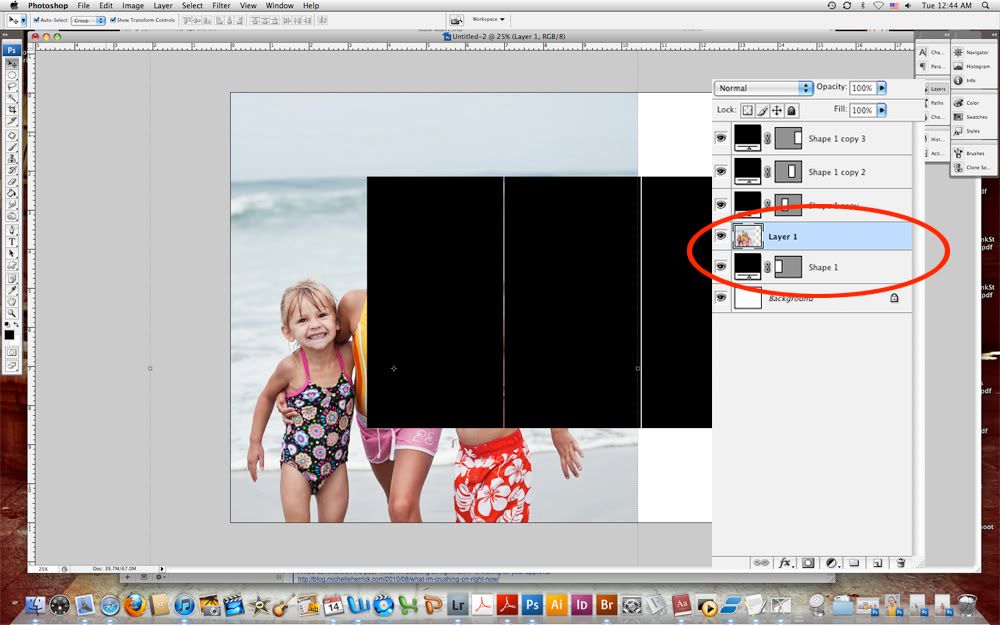
Next, in the layers palette (shown above with large red circle) we are going to clip the photo to the bottom black rectangle. You do this by taking the cursor (small black arrow or pointed finger) and hovering it right on the light between the photo layer and the black shape layer underneath it. When the cursor is right on the line you need to hold down the option button on your keyboard - when you do this your cursor should turn into two circles intersecting - then with your mouse, click. Your storyboard should look something like this:
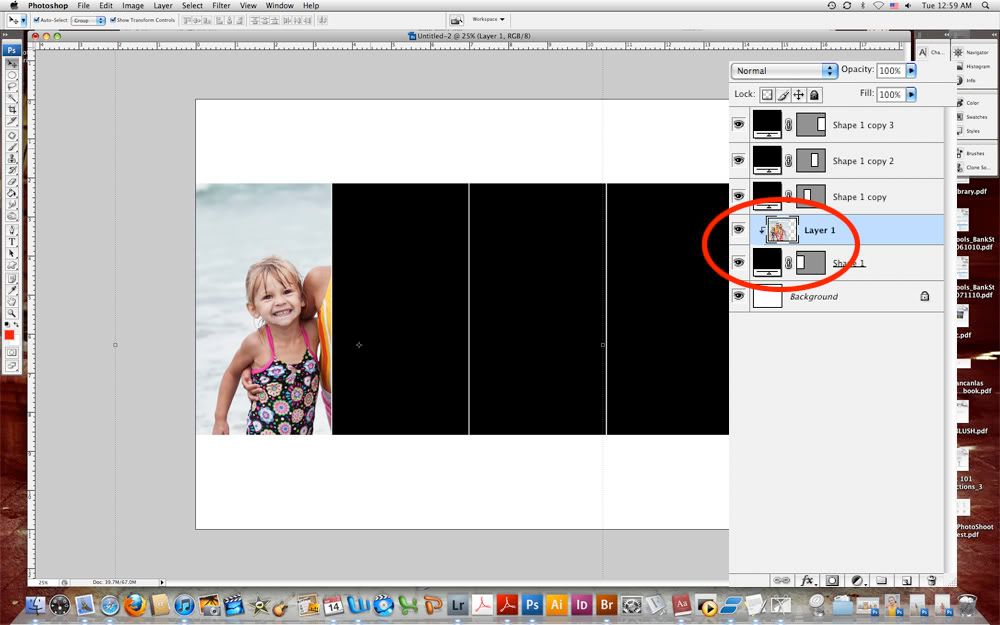
Now the easy part is resizing the photo to fit within the rectangle shape so that all the kids are seen. You do this by clicking and grabbing any one of the 4 corners of the photo and while holding down the shift key move the corner(s) in towards the center of the photo. Align it and move it around until you are happy with the placement of the photo.
Just repeat these steps again for each photo in the storyboard until you have all photos added.
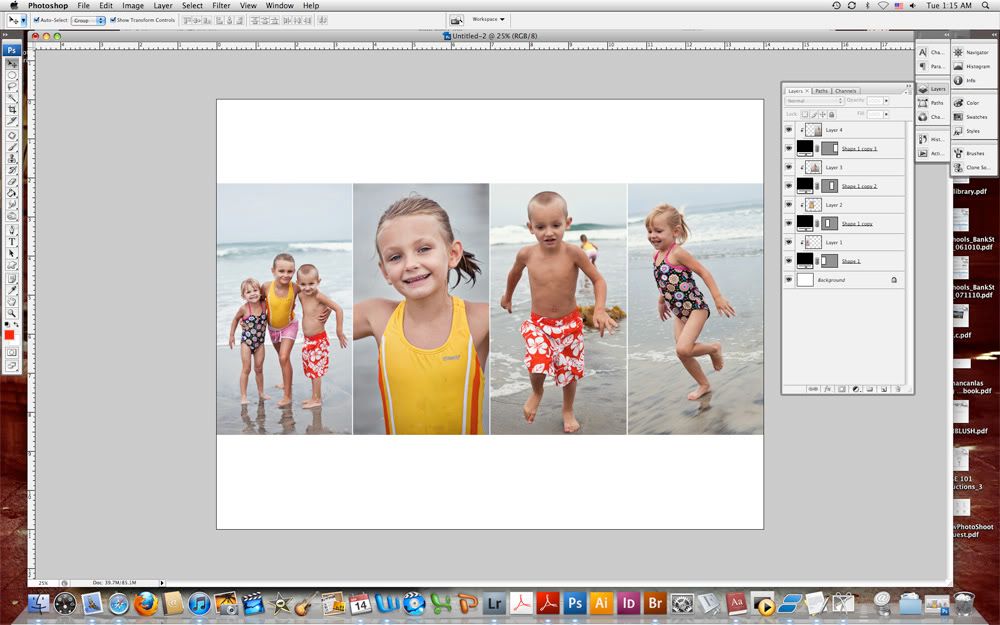
Then add in any text or graphic elements you want to complete your storyboard.
As a final step, you will need to compress all the layers by going to Layers > merge visible or Flatten image. Save as a .jpg and you are ready to send this file to your local photo lab.
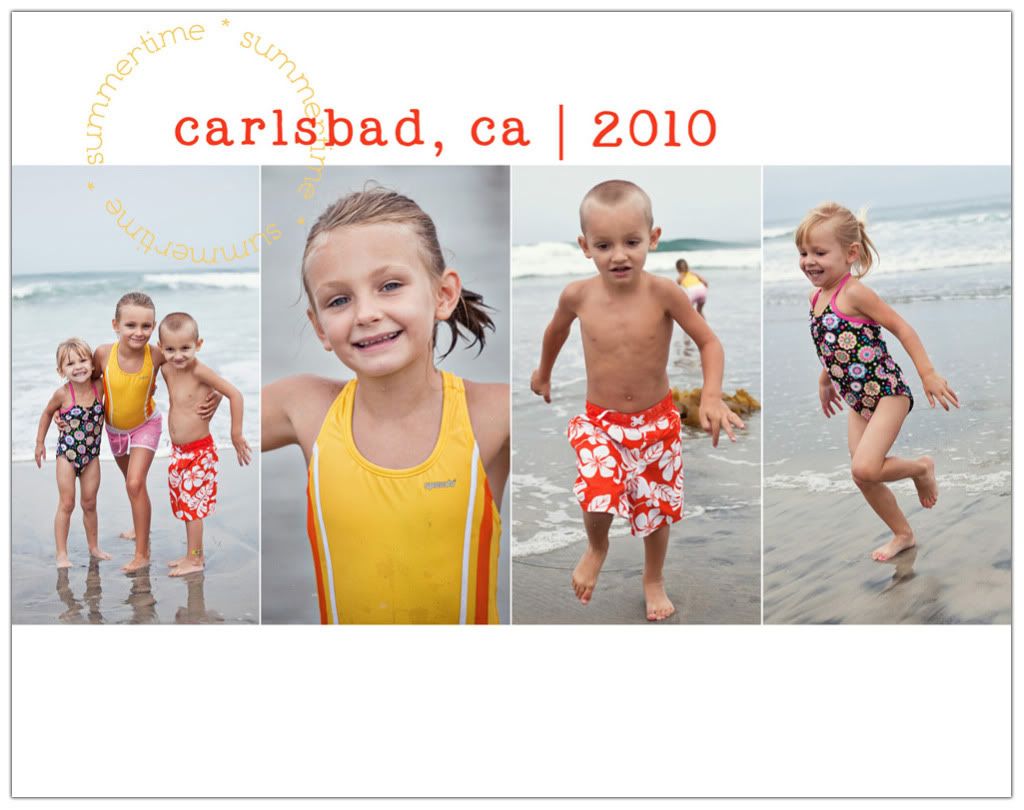
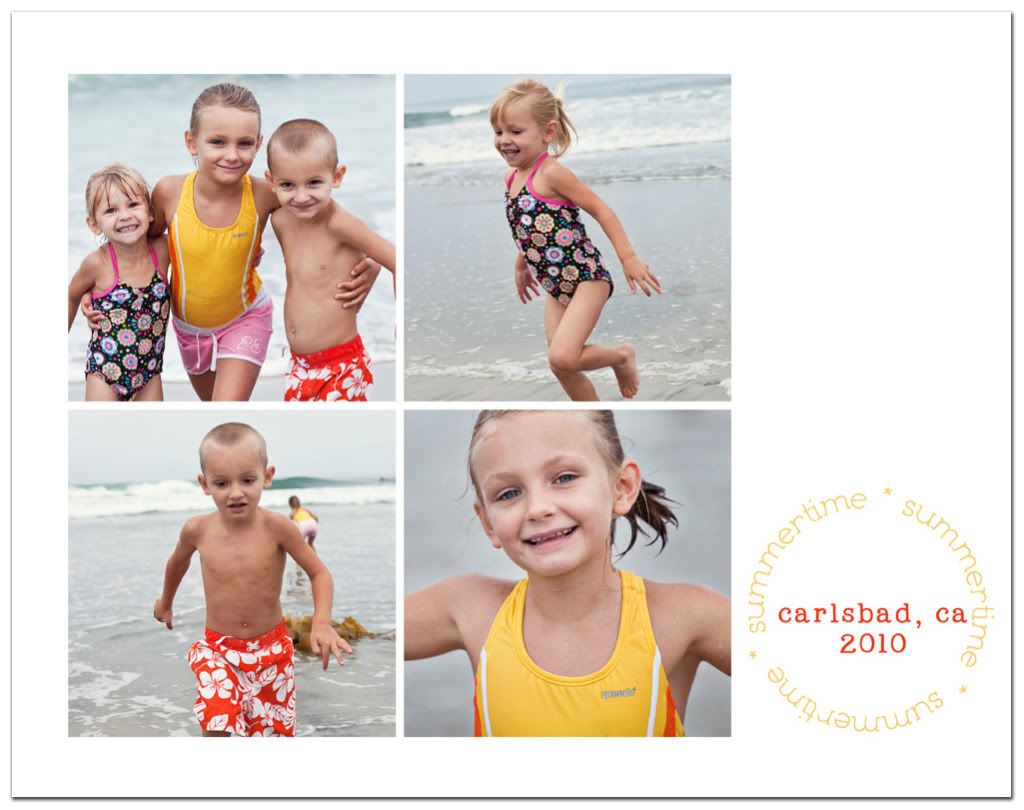
Other ideas and examples:

. . . . . . . . . . . . . . . . . . . . . . . .
PS: A sweet treat for you Arizonan's!
Check out the $25 and Under boutique this weekend!!

Featuring

"Ties for boys of every size"
aka: our stylish big sis ;)
Be sure to say h e l l o when you see us shopping!
. . . . . . . . . . . . . . . . . . . . . . . .
And on a FuN & RaNdOm note: whose heard of The Undomestic Momma? Super fun link up on Tuesdays...check it!

Top 2: Frizz-Ease Straightening Cream & Bed Head Control Freak.
The theme of our hair is STRAIGHT. ;)


. . . . . . . . . . . . . . . . . . . . . . . .
And on a FuN & RaNdOm note: whose heard of The Undomestic Momma? Super fun link up on Tuesdays...check it!
Top 2: Frizz-Ease Straightening Cream & Bed Head Control Freak.
The theme of our hair is STRAIGHT. ;)


This comment has been removed by the author.
ReplyDeleteI wish I had photoshop! Such a cute story board! I love control freak!!
ReplyDeleteCUTE stuff! :) ...and I will be at the boutique too! Maybe I'll see ya there!
ReplyDeleteI love Bedhead products! The camera shine is amazing!
ReplyDeleteThank you for linking this tute to A Crafty Soiree! I love storyboards but wasn't sure how to make them myself. It'll be great to be able to customize them! I really appreciate the little tips.
ReplyDeleteHi Girls! Thanks for joining us at A Crafty Soiree... I JUST got Photoshop so I am eager to try this! xoxo
ReplyDeleteMalia
Thanks for following Showcase Sisters, we're now following you back...love your blog! : )
ReplyDeleteHi, very interesting post, greetings from Greece!
ReplyDelete97685.....61435
ReplyDelete17526.....65403
ReplyDelete